To configure your own VPN hosted on your own VPS is not difficult at all, especially when there are numerous configuration scripts lying around the internet. We will set up such a VPN using Docker hosted on a Microsoft Azure VM.
Set Up
Listed below is my set up. You don’t have to use the exact set up as me, as the configurations should be the same with any VM (Virtual Machine) running Docker (that’s the beauty of Docker!).
- Azure VM running Ubuntu 16.04 Xenial
- The size of the Virtual Machine does not matter, so you can choose the cheapest one.
- You can use other Linux distributions, supported ones are:
- Ubuntu 16.04, 14.04, 12.04
- Debian 8 Jessie
- CentOS 7, 6
- VM has Port 4500 and 500 open for UDP connections.
- Latest
docker-engineinstalled - Using the IPsec VPN Server on Docker Docker image
Configuration
The configuration is extremely simple. You literally just follow the instructions listed on IPsec VPN Server on Docker. I shall summarise it below. The below instructions should be executed on the VM and I assume that you have the set up mentioned above.
-
Pull the image
$ docker pull hwdsl2/ipsec-vpn-server -
Create an environment file in your home directory e.g. (/home/dockeruser/vpn.env) with the following content:
VPN_IPSEC_PSK=<IPsec pre-shared key>
VPN_USER=<VPN Username>
VPN_PASSWORD=<VPN Password>
DO NOT put single or double quotes around values, or add space around =. Also, DO NOT use these characters within values: \ " '
-
Load the IPsec
NETKEYkernel module:$ sudo modprobe af_key -
Change directory to your home directory and execute below:
$ docker run \ --name ipsec-vpn-server \ --env-file ./vpn.env \ -p 500:500/udp \ -p 4500:4500/udp \ -v /lib/modules:/lib/modules:ro \ -d --privileged \ hwdsl2/ipsec-vpn-server -
Now you have a running VPN!
Ports
You have to remember to open up the ports (500/UDP and 4500/UDP) in order for this to work. I will describe how to do this for Azure VMs using the Network Security Group settings.
The following configuration assumes that your VM was created using Resource Manager and not Classic.
-
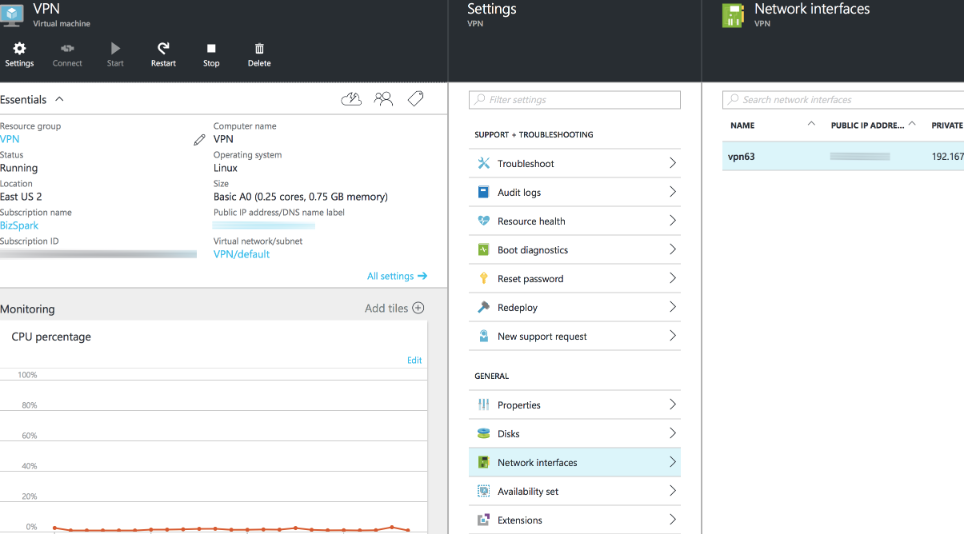
In your VM instance, select Settings->Network interfaces->Your VM interface.
-
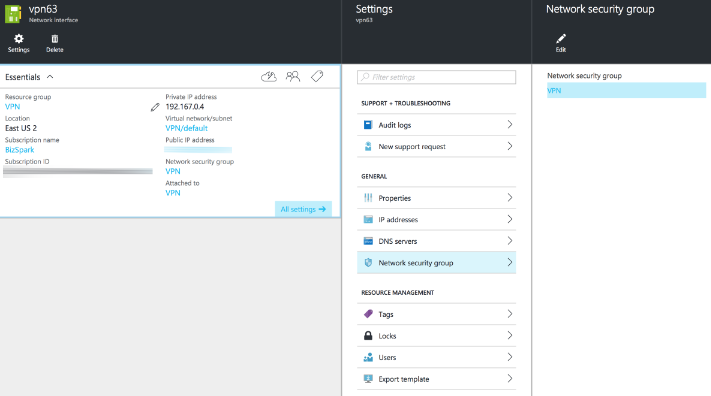
In the Network Interface, select Settings->Network security group->Your VM network security group. There should just be one by default.
-
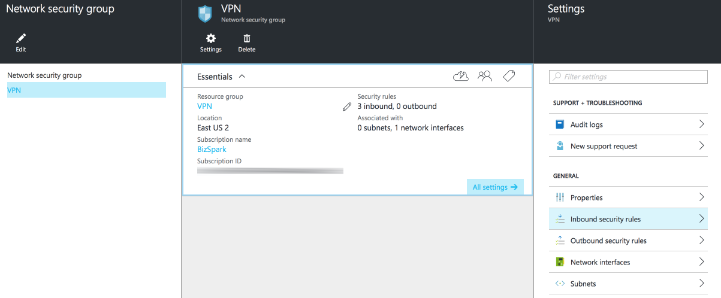
In the Network Security Group, select Settings->Inbound security rules->Your rules
-
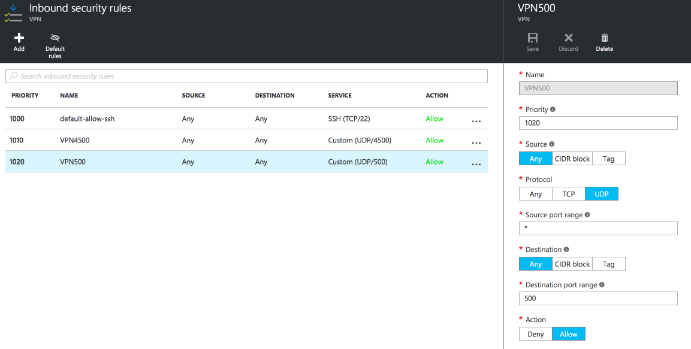
Add the two ports to your inbound rules: 500/UDP and 4500/UDP
Conclusion
Now you can go ahead and connect to your newly configured VPN! You can restart or stop your container at any time if you do not want to incur costs when you are not using it. This can all be achieved with one command thanks to Docker!